先承接上文,双特生面试很惨淡,老师们一直让我说我对数据科学的理解、我在数据科学方面有何突出。双特生选拔的是川大金字塔尖的人才,我本就是打肿脸充胖子,不过在候考期间认识了易佬,总体而言,收获很大。
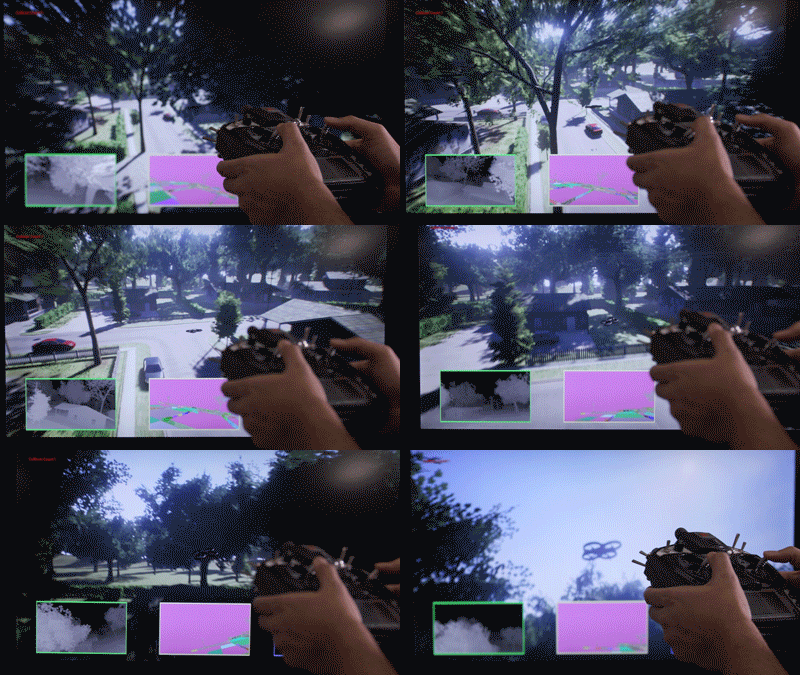
最近加入了空天学院飞行模拟协会,本打算做基于增强学习的飞行器自动对战。因为微软的AirSim与我们的主题很契合,我们便打算将AirSim+Unreal作为实验平台。近期老师计划让我研究AirSim的接口,以便把P3D模型移植到Unreal中。至于为什么要用P3D作为模型,事情就很复杂了,在此不赘述。原本的初衷是在编程中学习机器学习,却发现大部分时间做的都是和机器学习无关的偏向于工程的事情,每天在自己完全不熟悉的地方疲于奔命,还是让人不舒服。但话说回来,我的工程能力很差,这次项目也一定会增强我的代码能力。其次,如果真如老师所说,只要将自动对战做出来就能发SCI,那我虽然撑死算是二作,也死而无憾了。
今天搭建AirSim花了很多功夫,起先是看CSDN的搭建教程,安装了很多无用的包和库,而之后却总是遇到编译失败、无法找到Module文件等等错误,学长如数家珍地讲各种错误,真是令人心疼的熟练度。后来回归到AirSim的官方文档,才安安稳稳地搭建好了环境。他们加上我花了3、4天的时间来搭建一个小小的AirSim,算是令人啼笑皆非了。事成之后回想搭建过程,不禁另感慨我的学习能力和搜索能力实在过于低下,如果是其他人,相信1小时内绝对没问题。
言归正传,我们被CSDN的教程坑坏了,不想让别人也被坑了,下面是亲测有效的搭建流程,实际上是微软官方的Tutorial,能在我们头发寸断的情况下出马,令我这个渣感激涕零。
Build AirSim on Windows
Install Unreal Engine
Download the Epic Games Launcher. While the Unreal Engine is open source and free to download, registration is still required.
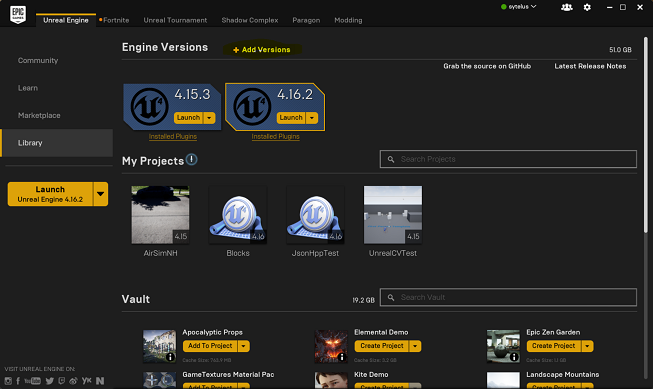
Run the Epic Games Launcher, open the Library tab from left, click on the “Add Versions” which should show the option to download Unreal 4.18 as shown below. If you have multiple versions of Unreal installed then make sure 4.18 is “Current” by clicking down arrow next to the Launch button for the version.
Note: If you have UE 4.16 or older projects, please see the upgrade guide to upgrade your projects.
Build AirSim
- You will need Visual Studio 2017 (make sure to install VC++) or newer.
- Start
x64 Native Tools Command Prompt for VS 2017. Create a folder for the repo and rungit clone https://github.com/Microsoft/AirSim.git. - Run
build.cmdfrom the command line. This will create ready to use plugin bits in theUnreal\Pluginsfolder that can be dropped into any Unreal project.
Setup Remote Control
Because We want to make program to control the vehicle, we didn’t setup the remote control.
So if you want to fly manually. See the remote control setup for more details.
We use APIs for programmatic control or use the so-called Computer Vision mode to move around using the keyboard.
Setup Unreal Environment
Finally, you will need an Unreal project that hosts the environment for your vehicles. AirSim comes with a built-in “Blocks Environment” which you can use, or you can create your own. We met a lot of problems in this section.
Option 1: Built-in Blocks Environment
To get up and running fast, you can use the Blocks project that already comes with AirSim. This is not very highly detailed environment to keep the repo size reasonable but we use it for various testing all the times and it is the easiest way to get your feet wet in this strange land.
Blocks environment is available in repo in folder Unreal/Environments/Blocks and is designed to be lightweight in size. That means its very basic but fast.
Here are quick steps to get Blocks environment up and running:
Windows
- Make sure you have installed Unreal and built AirSim.
- Navigate to folder
AirSim\Unreal\Environments\Blocksand runupdate_from_git.bat. - Double click on generated .sln file to open in Visual Studio 2017 or newer.
- Make sure
Blocksproject is the startup project, build configuration is set toDebugGame_EditorandWin64. Hit F5 to run. - Press the Play button in Unreal Editor and you will see something like in below video. Also see how to use AirSim.
Changing Code and Rebuilding
For Windows, you can just change the code in Visual Studio, press F5 and re-run. There are few batch files available in folder AirSim\Unreal\Environments\Blocks that lets you sync code, clean etc.
Linux
- Make sure you have built the Unreal Engine and AirSim.
- Navigate to your UnrealEngine repo folder and run
Engine/Binaries/Linux/UE4Editorwhich will start Unreal Editor. - On first start you might not see any projects in UE4 editor. Click on Projects tab, Browse button and then navigate to
AirSim/Unreal/Environments/Blocks/Blocks.uproject. - If you get prompted for incompatible version and conversion, select In-place conversion which is usually under “More” options. If you get prompted for missing modules, make sure to select No so you don’t exit.
- Finally, when prompted with building AirSim, select Yes. Now it might take a while so go get some coffee :).
- Press the Play button in Unreal Editor and you will see something like in below video. Also see how to use AirSim.
Changing Code and Rebuilding
For Linux, make code changes in AirLib or Unreal/Plugins folder and then run ./build.sh to rebuild. This step also copies the build output to Blocks sample project. You can then follow above steps again to re-run.
Chosing Your Vehicle: Car or Multirotor
By default AirSim spawns multirotor. You can easily change this to car and use all of AirSim goodies. Please see using car guide.
Option 2: Create Your Own Unreal Environment
If you want to setup photo-realistic high quality environments, then you will need to create your own Unreal project. This is little bit more involved but worthwhile!
The following contains the complete instructions start to finish for setting up Unreal environment with AirSim. The Unreal Marketplace has several environment available that you can start using in just few minutes. It is also possible to use environments available on websites such as turbosquid.com or cgitrader.com with bit more effort (here’s tutorial video). In addition there also several free environments available.
Below we will use a freely downloadable environment from Unreal Marketplace called Landscape Mountain but the steps are same for any other environments. You can also view these steps performed in Unreal AirSim Setup Video.
Note for Linux Users
There is no Epic Games Launcher for Linux which means that if you need to create custom environment, you will need Windows machine to do that. Once you have Unreal project folder, just copy it over to your Linux machine.
Step by Step Instructions
- Make sure AirSim is built and Unreal 4.18 is installed as described in build instructions.
- In
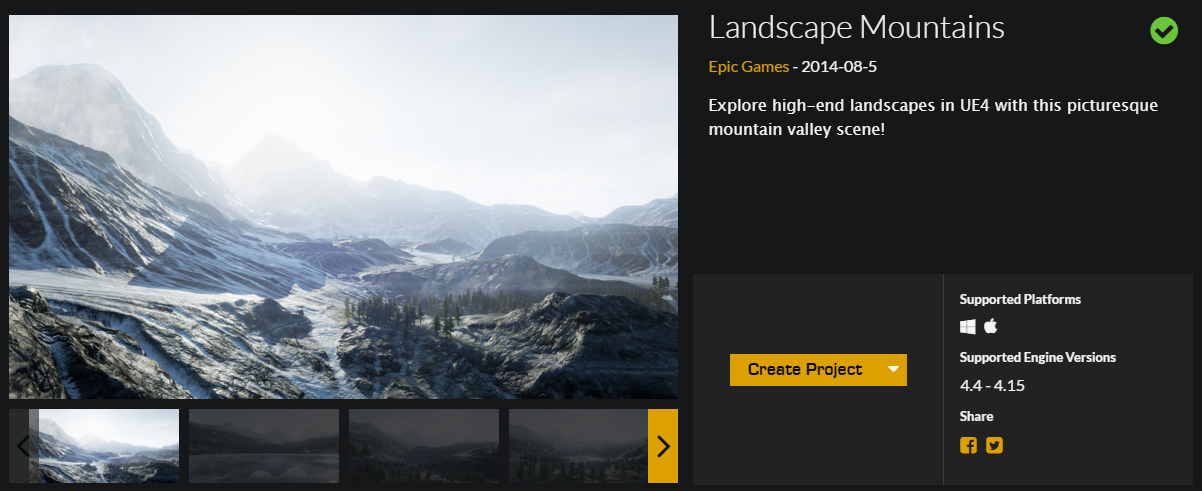
Epic Games Launcherclick the Learn tab then scroll down and findLandscape Mountains. Click theCreate Projectand download this content (~2GB download).
- Open
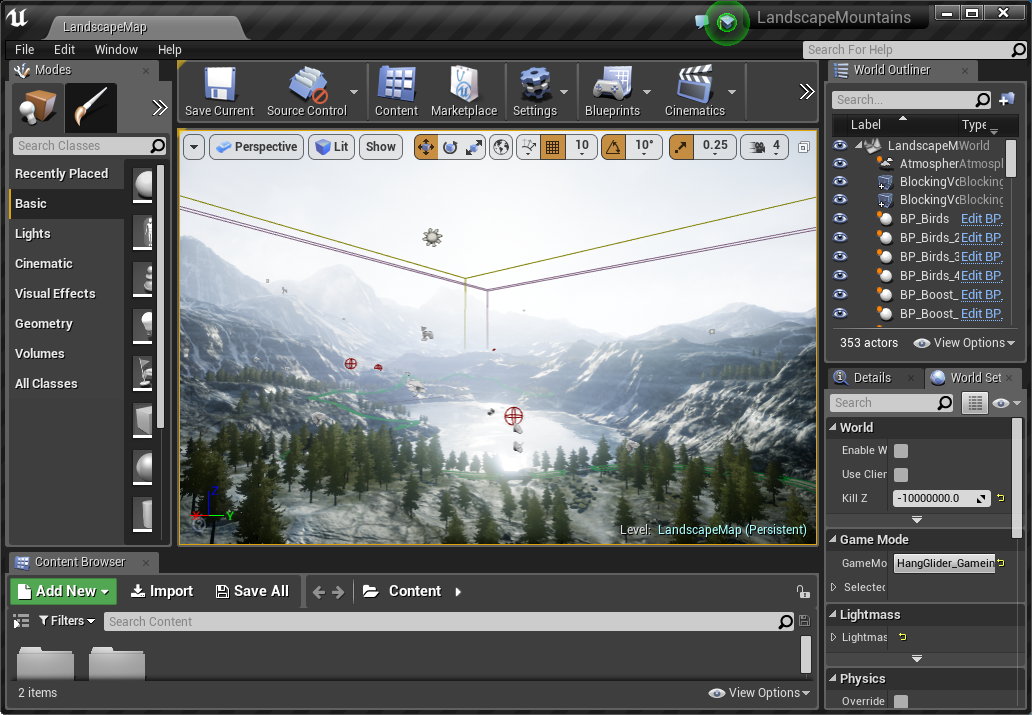
LandscapeMountains.uproject, it should launch the Unreal Editor.
From the
File menuselectNew C++ class, leave defaultNoneon the type of class, clickNext, leave default nameMyClass, and clickCreate Class. We need to do this because Unreal requires at least one source file in project. It should trigger compile and open up Visual Studio solutionLandscapeMountains.sln.Go to your folder for AirSim repo and copy
Unreal\Pluginsfolder in to yourLandscapeMountainsfolder. This way now your own Unreal project has AirSim plugin.Edit the
LandscapeMountains.uprojectso that it looks like this
1 | { |
- Close Visual Studio and the
Unreal Editorand right click the LandscapeMountains.uproject in Windows Explorer and selectGenerate Visual Studio Project Files. This step detects all plugins and source files in your Unreal project and generates.slnfile for Visual Studio.
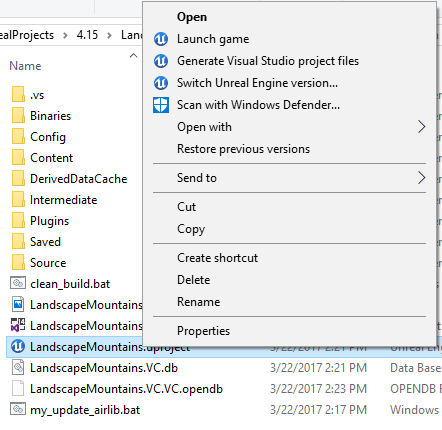
Tip: If the Generate Visual Studio Project Files option is missing you may need to reboot your machine for the Unreal Shell extensions to take effect. If it is still missing then open the LandscapeMountains.uproject in the Unreal Editor and select Refresh Visual Studio Project from the File menu.
- Reopen
LandscapeMountains.slnin Visual Studio, and make sure “DebugGame Editor” and “Win64” build configuration is the active build configuration.
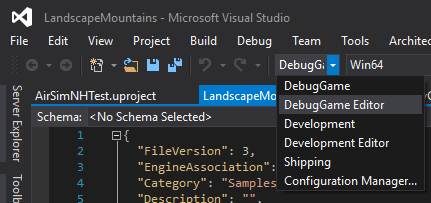
- Press
F5torun. This will start the Unreal Editor. The Unreal Editor allows you to edit the environment, assets and other game related settings. First thing you want to do in your environment is set upPlayerStartobject. In Landscape Mountains environment,PlayerStartobject already exist and you can find it in theWorld Outliner. Make sure its location is setup as shown. This is where AirSim plugin will create and place the vehicle. If its too high up then vehicle will fall down as soon as you press play giving potentially random behaviour.
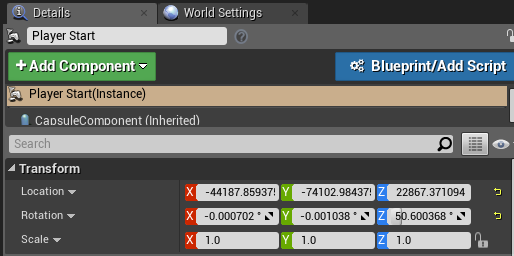
- In
Window/World Settingsas shown below, set theGameMode OverridetoAirSimGameMode:
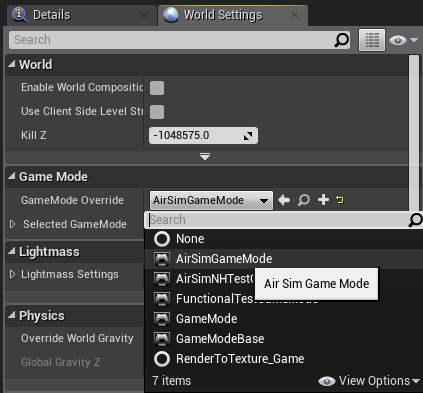
- Be sure to
Savethese edits. Hit the Play button in the Unreal Editor. See how to use AirSim.
Congratulations! You are now running AirSim in your own Unreal environment.
Chosing Your Vehicle: Car or Multirotor
By default AirSim spawns multirotor. You can easily change this to car and use all of AirSim goodies. Please see using car guide.
Updating Your Environment to Latest Version of AirSim
Once you have your environment using above instructions, you should frequently update your local AirSim code to latest version from GitHub. Below are the instructions to do this:
- First put clean.bat (or clean.sh for Linux users) in the root folder of your environment. Run this file to clean up all intermediate files in your Unreal project.
- Do
git pullin your AirSim repo followed bybuild.cmd(or./build.shfor Linux users). - Replace [your project]/Plugins folder with AirSim/Unreal/Plugins folder.
- Right click on your .uproject file and chose “Generate Visual Studio project files” option. This is not required for Linux.
Changing Code and Development Workflow
To see how you can change and test AirSim code, please read our recommended development workflow.
OK, wish you a good day!
- 本文作者: YA
- 本文链接: http://www.yuuuuang.com/2018/06/03/AirSim搭建/
- 版权声明: 本博客所有文章除特别声明外,均采用 MIT 许可协议。转载请注明出处!


